- Login and click
 Self Service > Student Center.
 - Under Personal Information, click on the Demographic Data link.
- Your demographic information appears on the page.
You can view and update a variety of information under this heading in the Student Center, including the following items. Instructions to update each are listed below.
To Change Your Home Address
- In the Student Center, under the Personal Information heading, click on the Home Address link.
- Click on the “edit” button next to your home address.
- On the next screen, delete the old address, type in the new address and the date that you want the change to become effective. Click the
 button.
To Change Your Telephone Numbers
- In the Student Center, under the Personal Information heading, click on the Home Telephone link.
- Edit your phone numbers as desired. To add a phone number, click the Add a Phone Number button.
- When finished, click the Save button.
To Add an Email Address
- In the Student Center, under the Personal Information heading, select Email Addresses from the dropdown and click the
 button.
 - Click the Add an Email Address button.
- Select the email type of “Other” and type in your email address.
- Click the Save button.
To Add an Emergency Contact
- In the Student Center, under the Personal Information heading, click on the Emergency Contacts link.
- If you have never supplied an emergency contact before, click the Add an Emergency Contact button.
- Complete the address and phone options following the onscreen instructions.
- When finished, click the Save button.
- Click OK on the confirmation screen to return to the Emergency Contacts page.
- If you have more than one emergency contact, designate the primary contact by clicking the Change the primary contact button and selecting your desired primary contact from the dropdown list. Click Save and then OK on the confirmation screen to return to the Emergency Contacts page.
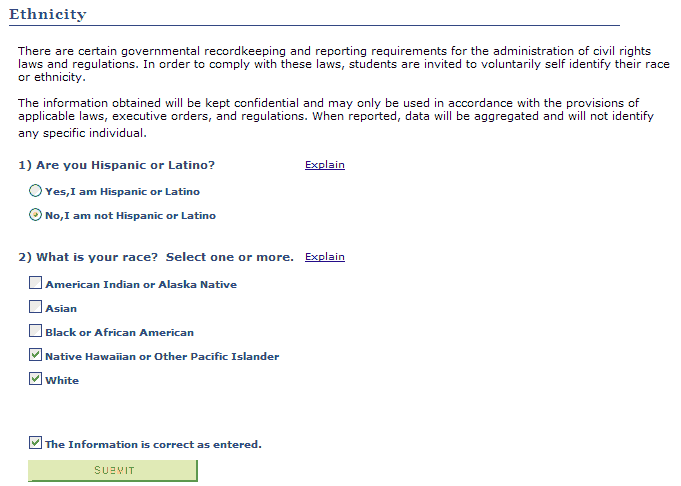
To Indicate Ethnicity
- In the Student Center, under Personal Information, click the Demographic Data link.
- Click on the Ethnicity tab.
- Two questions are presented. Click the Explain link for an explanation of each, if needed.
- Select the appropriate radio button to answer the first question, and click the checkbox next to one or more choices on the second question.
- Click to check the checkbox next to The Information is correct as entered, then click the
 button.
 - If you want to optionally further identify your ethnicity, click on the
 button.

- Select the desired descriptor from the Background dropdown. Use the
 button to add another line for as many additional selections as desired.
 - When finished, click the
 button at the bottom of the screen. Click the Return to Student Center link to exit.
To Update Your Name
To update your Preferred Name (which is reflected on the class roster and in Moodle),
- In the Student Center, under the Personal Information heading, select Names.
- Click the Edit button and type in your preferred first, middle, and last name.
- If the new name is to take effect at some point in the future, please insert that date into the Date Changes Will Take Effect field.
- Click the Save button.
To update your Primary/Legal Name (which is reflected on your official transcript), please complete the Name Change Form (PDF) and submit it, along with a copy of your Social Security card reflecting the new name, to:
- Registration and Records
Jordan Hall 133
4600 Sunset Avenue
Indianapolis, IN 46208
FAX: 317-940-6539
To Indicate Sexual Orientation
- In the Student Center, under Personal Information, click on the Sexual Orientation link.
- Click to select the desired radio button next to your orientation.
- Click the
 button. A brief confirmation message will appear.
 - Click on the Return to Student Center link to return to the student center.
