How Safe Is It To Eat Takeout

The food service industry is relying on takeout and delivery orders to keep businesses afloat and maintain effective social distancing for customers and workers.
Don Schaffner had Thai takeout for dinner a few nights ago, just as he did occasionally in the weeks and months before the current COVID-19 pandemic.

That’s worth knowing. Schaffner is a distinguished professor at Rutgers University in New Jersey whose expertise includes quantitative microbial risk assessment, predictive food microbiology, hand-washing and cross-contamination.

“I know people are worried, but from what we know currently about the virus, it’s safe to eat food prepared at restaurants so long as you take the proper precautions — in particular hand-washing,” says Schaffner.

As the coronavirus spreads in the U.S. and Americans heed directives to stay home, takeout and delivery of prepared food is picking up. Yet in these fearful times, many of us are wondering if eating takeout is a good idea. (Plus shouldn’t we be cooking all those groceries we stocked up on?)

Luckily for lazy cooks, eating food prepared in restaurants appears to be a safe choice. Current guidance from the Food and Drug Administration states that “there is no evidence to suggest that food produced in the United States can transmit COVID-19.

www.npr.org/sections/health-shots/2020/04/08/822903487/how-safe-is-it-to-eat-take-out

10 Inexpensive Ways to Save on Heating Bills

10 Inexpensive Ways to Save on Heating Bills

The following are inexpensive ways you can shave your heating expenses this winter.

1. Use a programmable thermostat. A programmable thermostat can help you save 10-20% on your energy bill year round. Program your heater to come on right before you wake up, cool down when you leave for work, warm up when you return from work, and go down again right before you go to bed.

How much will it save you? You can save 1% off your heating bill for every degree you lower your thermostat over an 8 hour period. Many people can save enough money with their first month’s use to pay for the thermostat. Cost: $20 and up. Savings: 10-20% of your monthly energy bill.

2. Change air filters. Clean air filters permit a better flow of air through your heating system, allowing hot air to more easily flow through the vents and into your rooms. You also reduce the strain on your furnace, which can extend its life. Change your air filter monthly, or whenever it is dirty. Bonus benefit – cleaner, healthier air! Cost: $2-10.

3. Seal the leaks in your house. Your house leaks hot air! But if you seal most of these leaks, you can save between 10-20% on your heating bill this winter. To detect leaks, wait until it is cold outside; you will probably need at least a 30-degree difference in the indoor/outdoor temperatures to notice the difference.

Common areas to find leaks include around doors, windows, near the attic, where wires and cables enter your house, and around electrical outlets. Seal gaps around any pipes, wires, vents or other openings with caulk or weather stripping. Cost: $5 and up. Savings: 10-20% of your heating bill.

4. Add insulation to your house. Insulation helps keep the hot air in and the cold air out. This can not only save you money, but it can also be a tax-deductible home improvement which will give you an even better return for your investment!

Basement insulation is often overlooked and will help keep your house warmer during winter months. Cost: Depends on how much and which type of insulation. Savings: Depends on how much and which type of insulation and whether or not it is tax deductible.

5. Seal heating ducts. – Most ducts have small leaks that allow your heated air to slowly escape. You can prevent this with a roll of metallic tape for about $10 (don’t use duct tape – it degrades over time!).

You can also use a liquid or aerosol-based sealant, which sometimes works better than tape, but is messier. Pay special attention to sections of ducting with kinks, bends, breaks, and disconnections. Cost: $10 and up.

6. Insulate heating ducts: You can lose up to 60% of your heated air before it reaches the outlet if you have non-insulated ducts that travel through unheated spaces such as the attic or basement. Special duct insulation can help you retain heat and energy and save a lot of money over the long term.

This is a great idea if you will be living in your house for a few years. Cost: $10 and up. Savings: 10% of your energy bill or more.

7. Use space heaters. At night we turn the heat down to 55 in the house and use a space heater in our bedroom. This allows us to only heat the space we need. Be careful when using space heaters – keep them clear of walls and flammable objects. You should also exercise caution when using them around children. Cost: $15-$35

8. Humidifiers. Using a humidifier can reduce your heating costs because moist air retains heat better than dry air. There are other benefits to using a humidifier as well: they reduce static electricity (and annoying winter time shocks!), dry skin, and make it easier to breathe. Cost: $30 and up.

9. Air Vent Booster. An air-vent booster is a fan you install over your vent that works by drawing additional air into a room that is always way too hot or cold. I recently installed one in our “problem room,” and the results have been quite good. It helps lower our utility bills and saves a large amount of energy. The model I have is the AirFlow Breeze, which costs about $50. Cost: $40 and up.

10. Install plastic window treatments. Installing heavy duty clear plastic window treatments can reduce the amount of heat loss through your windows. This is a great idea if your windows are single pane windows. You can save up to 10% of your heating costs by installing these. Cost: $5 and up.

Of course, if you do all of these, you won’t be able to reduce your heating bill to nothing! There is a law of diminishing returns that must come into play somewhere.

But, most of these are inexpensive and easy enough for just about anyone to do. Not only do they save a lot of money, but they reduce your energy usage which is great for the environment.

https://cashmoneylife.com/save-on-heating-bills/

Ice Storm Precautions

To prepare for a winter storm you should do the following:

BEFORE

  • Add the following supplies to your emergency kit:
  • Rock salt or more environmentally safe products to melt ice on walkways. Visit the Environmental Protection Agency for a complete list of recommended products.
  • Sand to improve traction.
  • Snow shovels and other snow removal equipment.
  • Sufficient heating fuel. You may become isolated in your home and regular fuel sources may be cut off. Store a good supply of dry, seasoned wood for your fireplace or wood-burning stove.
  • Adequate clothing and blankets to keep you warm.
  • Make a Family Communications Plan. Your family may not be together when disaster strikes, so it is important to know how you will contact one another, how you will get back together and what you will do in case of an emergency.
  • Listen to a NOAA Weather Radio or other local news channels for critical information from the National Weather Service (NWS). Be alert to changing weather conditions.
  • Minimize travel. If travel is necessary, keep a disaster supplies kit in your vehicle.
  • Bring pets/companion animals inside during winter weather. Move other animals or livestock to sheltered areas with non-frozen drinking water.

AFTER

  • Stay indoors during the storm.
  • Walk carefully on snowy, icy, walkways.
  • Avoid overexertion when shoveling snow. Overexertion can bring on a heart attack—a major cause of death in the winter. If you must shovel snow, stretch before going outside.
  • Keep dry. Change wet clothing frequently to prevent a loss of body heat. Wet clothing loses all of its insulating value and transmits heat rapidly.
  • Watch for signs of frostbite. These include loss of feeling and white or pale appearance in extremities such as fingers, toes, ear lobes, and the tip of the nose. If symptoms are detected, get medical help immediately.
  • Watch for signs of hypothermia. These include uncontrollable shivering, memory loss, disorientation, incoherence, slurred speech, drowsiness, and apparent exhaustion. If symptoms of hypothermia are detected, get the victim to a warm location, remove wet clothing, warm the center of the body first and give warm, non-alcoholic beverages if the victim is conscious. Get medical help as soon as possible.
  • Drive only if it is absolutely necessary. If you must drive: travel in the day; don’t travel alone; keep others informed of your schedule; stay on main roads and avoid back road shortcuts.
  • Let someone know your destination, your route, and when you expect to arrive. If your car gets stuck along the way, help can be sent along your predetermined route.
  • If the pipes freeze, remove any insulation or layers of newspapers and wrap pipes in rags. Completely open all faucets and pour hot water over the pipes, starting where they were most exposed to the cold (or where the cold was most likely to penetrate).
  • Maintain ventilation when using kerosene heaters to avoid build-up of toxic fumes. Refuel kerosene heaters outside and keep them at least three feet from flammable objects.
  • Conserve fuel, if necessary, by keeping your residence cooler than normal. Temporarily close off heat to some rooms.
  • If you will be going away during cold weather, leave the heat on in your home, set to a temperature no lower than 55ºF.

marionprepares.org/be-prepared/ice-storms/

Helpful Winter Driving Tips

Cold Weather Driving Tips

  • Keep a bundle of cold-weather gear in your car, such as extra food and water, warm clothing, a flashlight, a glass scraper, blankets, medications, and more.
  • Make certain your tires are properly inflated and have plenty of tread.
  • Keep at least half a tank of fuel in your vehicle at all times.
  • Never warm up a vehicle in an enclosed area, such as a garage.
  • Do not use cruise control when driving on any slippery surface, such as on ice and snow.

Tips for Driving in the Snow

  • Stay home. Only go out if necessary. Even if you can drive well in bad weather, it’s better to avoid taking unnecessary risks by venturing out.
  • Drive slowly. Always adjust your speed down to account for lower traction when driving on snow or ice.
  • Accelerate and decelerate slowly. Apply the gas slowly to regain traction and avoid skids. Don’t try to get moving in a hurry and take time to slow down for a stoplight. Remember: It takes longer to slow down on icy roads.
  • Increase your following distance to five to six seconds. This increased margin of safety will provide the longer distance needed if you have to stop.
  • Know your brakes. Whether you have antilock brakes or not, keep the heel of your foot on the floor and use the ball of your foot to apply firm, steady pressure on the brake pedal.
  • Don’t stop if you can avoid it. There’s a big difference in the amount of inertia it takes to start moving from a full stop versus how much it takes to get moving while still rolling. If you can slow down enough to keep rolling until a traffic light changes, do it.
  • Don’t power up hills. Applying extra gas on snow-covered roads will just make your wheels spin. Try to get a little inertia going before you reach the hill and let that inertia carry you to the top. As you reach the crest of the hill, reduce your speed and proceed downhill slowly.
  • Don’t stop going up a hill. There’s nothing worse than trying to get moving up a hill on an icy road. Get some inertia going on a flat roadway before you take on the hill.

Winter Driving Tips

16

Avoid Romaine Lettuce: CDC Warning

Based on new information, CDC is advising that consumers not eat and retailers not sell any romaine lettuce harvested from the Salinas, California growing region.

  • Most romaine lettuce products are labeled with a harvest location showing where they were grown.
  • This advice includes all types of romaine lettuce harvested from Salinas, California such as whole heads of romaine, hearts of romaine, and packages of pre-cut lettuce and salad mixes which contain romaine, including baby romaine, spring mix, and Caesar salad.
  • If you have romaine lettuce at home:
    • Look for a label showing where the romaine lettuce was grown. It may be printed on the package or on a sticker.
    • If the label says “Salinas” (whether alone or with the name of another location), don’t eat it, and throw it away.
    • If it isn’t labeled with a growing region, don’t eat it, and throw it away.
    • If you don’t know if the lettuce is romaine or whether a salad mix contains romaine, don’t eat it, and throw it away.
    • Wash and sanitize drawers or shelves in refrigerators where romaine lettuce was stored.
  • If you are buying romaine lettuce at a store:
    • Look for a label showing where the romaine lettuce was grown. It may be printed on the package or on a sticker.
    • If the label says “Salinas” (whether alone or with the name of another location), don’t buy it.
    • If it isn’t labeled with a growing region, don’t buy it.
    • The recalled salad products have “Use By” dates ranging from October 29, 2019, to November 1, 2019.
    • The recalled products have establishment number “EST. 18502B” inside the USDA mark of inspection.

www.cdc.gov/ecoli/2019/o157h7-11-19/index.html

Food Safety Charts

Food Safety Charts

With Thanksgiving right around the corner, it may be helpful to check the charts available on the links below.

The keys to basic food safety are cooking it to the right temperature and storing it properly.

Foods are properly cooked when they are heated for a long enough time and at a high enough temperature to kill the harmful bacteria that cause foodborne illness. Properly storing foods preserves food quality and prevents both spoilage and food poisoning. Consult the easy-to-read charts below to learn how to cook and store your food the right way.

  • Safe Minimum Cooking Temperatures: Cook all food to these minimum internal temperatures as measured with a food thermometer for safety.
  • Cold Food Storage Chart: Storage guidelines for home-refrigerated foods to keep them from spoiling or becoming dangerous to eat.
  • Meat and Poultry Charts: Use these timetables to determine how long to cook meat & poultry products. Times are approximate.
  • Food Safety in a Disaster or Emergency: How to keep food safe during and after an emergency, such as a flood, fire, national disaster, or the loss of power.

www.foodsafety.gov/food-safety-charts


Have a Safe Halloween

10 EASY THINGS YOU CAN DO TO KEEP KIDS SAFE ON HALLOWEEN

halloween press release 2015

Children are twice as likely to be hit by a car and killed on Halloween than on any other day.

Washington, D.C. – Halloween can be one of the most fun nights of the year for children across America, but for parents, it can be the most nerve-wracking as well. On average, twice as many kids are killed while walking on Halloween than on any other day of the year. By taking just a few simple precautions, kids, parents and drivers can make the night fun and safe.

Tips for a Happy (and Safe) Halloween

Safe costumes:

  • Decorate costumes and bags with reflective tape or stickers and, if possible, choose light colored clothing.
  • Masks can obstruct a child’s vision, so choose non-toxic face paint and make-up whenever possible.
  • Have children carry glow sticks or flashlights so they can see better, as well as be seen by drivers.

Safe walking:

  • Stay alert – Watch out for cars that are turning or backing up and don’t dart out into the street or cross in between parked cars.
  • Walk on sidewalks or paths. If there are no sidewalks, walk facing traffic as far to the left as possible.
  • Put electronic devices down and keep heads up and walk, don’t run, across the street.
  • It’s best to cross the street safely at corners. And always look left, right and left again when crossing and keep looking as you cross.

Safe driving:

  • Slow down in residential neighborhoods. Remember that popular trick-or-treating hours are 5:30 to 9:30 p.m.
  • Be especially alert and take extra time to look for kids at intersections, on medians and on curbs. Children are excited on Halloween and may move in unpredictable ways.
  • Reduce any distractions inside your car, such as talking on the phone or eating, so you can concentrate on the road and your surroundings.

“On Halloween, kids are so excited that they probably aren’t thinking about walking safely,” said Kate Carr, president and CEO of Safe Kids Worldwide. “That’s why we’re encouraging parents to talk with their kids before Halloween night about how to stay safe while walking, and then join them for trick-or-treating, especially if the kids are 10 and under.”

Long before letting them head outside for trick or treating, talk to your kids about watching out for cars. Teach kids to make eye contact with drivers before crossing the street and use crosswalks, when possible. Additionally, parents can use glow sticks, flashlights or reflective trick-or-treat bags to make sure kids’ costumes are visible to drivers.

For more tips on how to help kids become safer pedestrians on Halloween, and throughout the year, visit www.safekids.org and visit our Facebook page at www.facebook.com/safekidsworldwide.

Teens and Running Tips

Safety Tips: Running

Whether it’s as part of a high school track program or cross-country team or a way to get in shape, running is a wonderful sport. It’s great exercise, almost anyone can do it, and all you really need to get started is a good pair of sneakers.

These tips can help you run safely.

Safe Running Gear

Shoes

It’s best to get fitted for running shoes by a trained professional. They can help runners get shoes that:

  • fit well
  • have good support with a thick, shock absorbing-sole

Minimalist shoes are becoming popular, but there’s no evidence that they’re better than regular running shoes.

Socks

Running socks come in a variety of materials, thicknesses, and sizes. Avoid socks made from 100% cotton. When cotton gets wet, it stays wet, leading to blisters in the summer and cold feet in the winter. Instead, buy socks made from wool or synthetic materials such as polyester and acrylic.

Safe Training and Running

To prevent injuries while training or running:

  • Get a sports physical before running.
  • Train sensibly, by increasing distances and speed slowly.
  • Warm up and stretch before running. Dynamic stretching is the best kind of stretching before a run or workout.
  • Stop running if you get hurt or feel pain. Get checked by an athletic trainer, coach, doctor, or nurse before going back to running.

Safety While Running Outdoors

It’s important to stay alert while running outdoors. Don’t wear headphones or earbuds or anything else that might make you less aware of your surroundings. Staying safe while running involves the same common sense used to stay safe anywhere else, like avoiding parked cars and dark areas, and taking note of who is behind you and ahead of you.

Runners should carry a few essentials, such as:

  • a form of identification
  • a cellphone
  • a whistle to blow to attract attention if you’re hurt or in a situation where you don’t feel safe

Other safety tips:

  • Run during daylight hours, if possible. For nighttime running, avoid dimly lit areas and wear bright and/or reflective clothes.
  • Stay on the sidewalk or shoulder of a road, if possible.
  • Run facing oncoming cars.
  • Always yield to vehicles at intersections. Don’t assume that cars will stop for you.
  • Obey all traffic rules and signals.
  • Only run through neighborhoods and parks and on trails known to be safe. It’s always best to run with a friend, if possible.
  • Dress for the weather. In cold weather, wear layers of sweat-wicking fabric, a hat, and gloves. On hot days, bring extra water and wear light-colored clothing and a hat. Stop running if you feel faint or sick in any way.

kidshealth.org/en/teens/safety-running.html

Tune Up Your Desk Ergonomics

Image result for desk ergonomics

Step 1: Find your natural posture

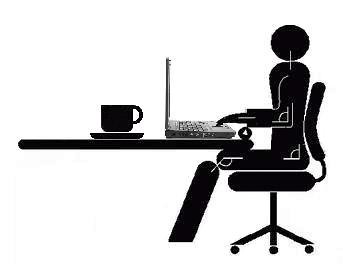
Scoot your chair away from your desk and sit down comfortably. For many people, it would look a lot like sitting in a car. Your feet are on the floor in front of you; your hands are in your lap; and your shoulders relax as you lean back just a bit. Your behind…is behind you.

It’s comfy, right? This is called your “natural posture.” In it, your vertebrae are stacked, your entire back moves as you breathe, and your pelvis is positioned so that your spine is stacked properly.

Memorize this natural posture. Since we’ve been taught to “sit up straight” and “tuck in” the tailbone, it won’t be an easy change.

With this in mind, you can start building an ergonomic workstation that supports this posture.

Step 2: Keyboard and mouse placement

Building around the natural posture, the keyboard and mouse should be positioned in a way that keeps your elbows to your sides, and your arms at or below a 90-degree angle. This way, the muscle load is reduced and you’re not straining.

Height. Position your keyboard 1 to 2 inches above your thighs. For most people, that probably means employing a pull-out keyboard tray. Alternatively, you can lower your desk, but the keyboard tray is a preferred method. Here’s why.

Tilt. The keyboard should ideally be positioned with a negative tilt — down and away from you, so that your arms and hand follow the downward slope of your thighs. That being said, never use the kickstands provided underneath most keyboards.

Position. Ideally, your keyboard and mouse should be shoulder-distance apart and as level as possible. A couple of things will help you achieve this.

First, consider purchasing a keyboard without a number pad, as the number pad puts the letter keys — your primary input tools — off-center. As for keeping the mouse and keyboard level, you might want to raise your keyboard with some DIYing, or get a flatter mouse.

Step 3: Position your screen(s)

Setting up your screen, or screens, doesn’t have to be complicated. Arrange them in this order, and you’ll be set.

Distance. If your screen is too far away, you’ll start doing something ergonomics experts like to call “turtling,” or craning your neck. Place the monitor too far away, and you’ll find yourself extending to reach it.

To find the sweet spot, sit back and extend your arm. The tips of your middle finger should land on your screen. That’s it.

If you have two monitors, set them up side by side (no gap), and place the secondary monitor off-center. Those who use both monitors equally should center them both. Now, sit back and extend your arm and pan in an arch. As you pan your arm, your finger tip should almost always touch the monitors. Use the same logic when placing other items, like a document holder or a phone.

Height. To adjust the height, try this ergo trick: close your eyes. When you open them, your eyes should land on the address bar. If not, lower or raise the monitors using the built-in option, with risers, or with a book.

Angle. Finally, tilt the monitors down just a smidge to avoid reflections.

Step 4: Adjust that chair

Your chair is your best ergonomic friend. It supports your back, your bottom, and your posture. There are many chairs to choose from, but only a few important things to look out for.

Shape. Think back to your natural posture. With your tailbone sticking out just a bit, and your vertebrae in their slight curve, the lumbar portion of your spine points in toward your belly. To help you sustain this posture, find a chair that offers good lumbar support.

Length. When you sit down, there should be a little space between the edge of the chair and the back of your knees, about the size of your fist. Depending on the chair, you might be able to adjust the seat depth accordingly.

Height. When you sit, your feet should be on the floor (not dangling) in front of you, and your thighs should be slightly below your hips. Shorter folks might need to use a footrest, while extra-tall types might need to adjust the height of the desk.

If you ever find yourself tucking your feet behind you, sitting on one leg, or in another funky position, you chair needs to be adjusted.

Step 5: Get up and move

After all is said and done, there’s one final piece that you can’t simply set-and-forget: physical activity. Take a break at least once an hour to walk around the office or stretch. If it helps, set an hourly alarm as a reminder.

No matter how ergonomic your workstation is, stretching your body is the only thing that can combat the health issues that arise from prolonged sitting.

www.cnet.com/how-to/how-to-set-up-an-ergonomic-workstation/