 Moodle has several ROLES you can be assigned in a particular course. This covers the various roles and their permissions as well as how to change your role to a student view. The student view is used when an instructor wants to verify what the students can see.
Category Archives: Getting Started with Moodle
02. Finding and hiding courses
This will show you how to find your courses and how to hide courses from view.
How can I see just my Fall 2015 courses?
You can filter the contents by selecting the ![]() drop down menu . Only courses that you are an instructor in will appear for the filter you select.
drop down menu . Only courses that you are an instructor in will appear for the filter you select.
Why are some of the courses in grey?
Courses that are in grey are not currently available to students.
How do I hide specific courses from my view?
Click on the eye ![]() next to the course that you want to hide. It will change to a closed eye
next to the course that you want to hide. It will change to a closed eye ![]() which indicates it will be hidden from your list.
which indicates it will be hidden from your list.
How do I unhide courses?
Click on ![]() at the bottom of the Moodle home screen. Click on the closed eye
at the bottom of the Moodle home screen. Click on the closed eye ![]() for any course you want to make visible (unhide). Click on
for any course you want to make visible (unhide). Click on ![]() at the top or bottom of the screen when you are finished editing your view.
at the top or bottom of the screen when you are finished editing your view.
01. What browsers are compatible with Moodle?
What browsers are compatible with Moodle?

 For best results, we recommend that you access Moodle with a recent version of Mozilla FIREFOX or Google CHROME. Additionally, it’s important to enable cookies and turn off any popup blockers in your browser.
Moodle will work in a variety of browsers, but there is some functionality within Moodle that won’t work unless you’re using a supported browser version. Read more about supported browsers, file formats and settings in our Moodle 2.8 Technical Recommendations article on the Moodle blog.
09. The Text Editor and Accessibility
Where did the text size and color buttons go in the Text Editor?
After the Moodle 2.8 upgrade you won’t be able to adjust the size and color of text: instead, you should use the PARAGRAPH STYLES button to select an appropriate heading or use bold or italics for emphasis.
Formatting text with size and color changes alone doesn’t translate well for users with vision disabilities, or those who are accessing your course with a screenreader.
Accessibility
Use the ![]() button to check your text for accessibility compliance. You can also use the
button to check your text for accessibility compliance. You can also use the ![]() to check for screen reader compatibility.
to check for screen reader compatibility.
In addition, when you add images to Moodle using the text editor you will be prompted to enter a description of the the image automatically when you click SAVE.
This Cheat Sheet provides you an overview of the functionality available to you in the Moodle text editor. This will help you better determine which buttons to utilize as you work in Labels, Assignments, Section descriptions, and any place you can edit text.
05. Combining Course Sections (Course Umbrella)
If you are teaching multiple sections of the same course you can combine them into one course. This is called a course Umbrella. This can make managing the courses easier if they are the same assignments and grading aggregation.
NOTE: Any activities and files you have added to your existing courses will not be included in the umbrella. We advise that you create your umbrella BEFORE you add your course material. Once you create an umbrella, you will not be able to unjoin courses from the umbrella without assistance from IT.
Only instructors and students enrolled by the “external database” method will be copied into an umbrella course. Instructors will immediately be added to the course umbrella. Students will take 24 hours to be included. Any students enrolled manually in the old courses must also be manually enrolled in the umbrella course.
To combine your courses into one umbrella
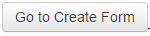
- Go to one of the courses that you want to umbrella and select
 from the Administration block under Users.
 - From the drop down menu
 choose
  .
. - Click on
 to create a new umbrella.
 - The recommended name for the New Umbrella Course Shortname will already be filled in for you. Tip: Write this name down, you’ll need it in step 4. below.
- Click on the
 button. A confirmation email will be sent to all instructors of the course with the new umbrella course’s name.
To add a course to an umbrella
- Go to another course that you would like to add to the Course Umbrella you just created.
- Follow steps 1 and 2 for this course.
- Click on
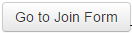 to add this course to an umbrella.
 - Enter the Shortname (you must know this in order to join the courses) of the existing Umbrella and click .
Instructors will immediately be added to the course umbrella. Students will take 24 hours to be included.
Note: The old courses will remain in your course list, to hide them follow the instructions in the Finding and Hiding Courses QuickGuide
08. Making Courses Available
By default, any course created in Moodle is hidden from students when it is first created. This allows you to take your time in building your course without being concerned over what your students will and won’t see. When you want to have your course visible to students, you must mark it as available.
- In the course that you want to make available, find the
 block on the right side of the page (it should be near the top).
 - Find the
 option. If it is listed in red, your course is not yet available to students. Click the
  under
under  to enable it.
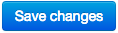
 - Click the
 button to save your changes and make your course available.
04. Importing Previous Courses
If you teach similar courses repeatedly from semester to semester, it can be useful to import old course content from a previous semester into a new course for the current semester. Moodle will allow you to import old activities and resources or even copy an entire course into another.
- In the course you want to import into (not the course you want to import from), go to the Administration block and click
 .
. - From the Import page, select the for the course you want to import from. Note that the page only shows ten courses. If you have more courses and the one you want isn’t listed, use the search box and click
 to find it.
 - Click
 to use the selected course for import.
 - You will be asked to select whether to
 ,
,  , or
, or  . Activities include things like assignment, quizzes, files, etc. Blocks include the blocks along the side of the course. Since these are mostly uniform, there may not be a change from semester to semester. Filters are often not altered and may be included or excluded. Check the boxes for each type you want, or leave them all checked if you want to copy the course exactly. Click
  .
. - If you have chosen to include activities, you will be asked which activities or resources to include. By default, all activities are checked, which is useful if you want to copy a course exactly. If not, you can check boxes for particular activities to only bring them over. Bear in mind, though, that to import an activity you must also bring the topic section (the bolded entries) that contains it.Warning: If you have any Turnitin assignments in the import (any entries with a
 next to them), you must deselect them before the import. Importing Turnitin assignments will create student conflicts between the old assignment and the new one.
Click. - You will be taken to a confirmation and review page. There are no options to set here; it’s just a summary of what’s selected for import and what is not. Anything marked with a
 will be imported, anything with a
  will not. Click
  to import the course.
 - You will be notified once the import is complete. Click
 when done.
06. Using the News Forum
Every Moodle course contains a special forum at the top of the course page called the news forum. The news forum is a tool for making announcements or otherwise communicating en masse with all of the students in your course. Any announcement you make in the news forum is emailed to every student, and copies of the announcement are kept on record in your course.
- Click on the
 at the top of your course page.
 - You’ll be taken to the list of announcements. If you’ve never posted an announcement, the page will be empty. Click
 to post an announcement.
 - Enter a
 and a
and a  for the announcement. Both will be sent in full to all students in the course.
 - Click the
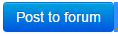 button at the bottom to post and send the announcement. You’ll be taken back to the list of announcement where you should see your new announcement posted.
 It’s possible to add an attachment to an announcement, but if you’re trying to get a file out to all your students, it may be a better idea to just upload it to your course page. You can use the news forum to announce that the file has been added and tell your students where it can be found.
07. Creating Groups
Moodle allows you to organize your students into groups. Groups can be useful for having different sets of students work on different assignments, or allowing you to communicate with or grade only certain subsets of students in courses of significant size. Additionally, creating groups will also allow you to define course sections within an umbrellaed course.
- From your course page, go to the Administration block and click
 .
. - Scroll down to the
 section and click it to expand it.
 - Change the
 drop-down to either
  or
or  . In separate groups, each group member can only see their own group. In visible groups, each group member works in their own group, but can also see other groups.
 - Click
 at the bottom of the page.
 - In the Administration Block, click the
 menu to expand it, and then click
  .
. - Click the
 button.
 - Enter a
 and click
  .
. - Select your new group in the
 column on the left, then click the
  button.
 - Click the students you want to add from the
 menu on the right and click the
  button. You may have to use the
  field below the student list to find the ones you want. When done, click the
  button.
 - Repeat steps 6 through 9 for each group you wish to create.
03. Adding Additional Users
Sometimes, you may need to add new users to a course that they’re not already present in. For a typical course, enrollment information comes from Registration and Records and is updated automatically; any drops/adds/withdrawals are automatically reflected in Moodle. If you’re managing a community organization page, however, or want to add users to a course in which they’re not officially enrolled, you will need to add them manually:
- From within the course to which you want to add new users, go to the Administration block and click .
- From the expanded Users menu, click
 .
. - You will be taken to a list of all the users currently enrolled in the course. Click the
 button.
 - In the window that appears, type the name of the user you want to add in the box at the bottom of the window and click
 .
. - Select the role you want them to have from the
 drop-down menu:
 will add the user with the same capabilities as students have.
 will add the user with the ability to add, remove, and change course content. Course Builders do not have access to grades.
 - Click the
 button next to the user you want to add. The window will stay open, and you can continue to add multiple users this way.
 - When you’re done, click
 .
.
 Click here to watch a video tutorial on this subject provided by Atomic Learning. Be sure to log in to Atomic Learning before attempting to view this tutorial.